9 simple steps to skim plastering a wall

Are your walls in need of some TLC? Cracks and uneven surfaces are difficult to cover up with a lick of paint. Use our step-by-step guide to help skim plaster your walls.

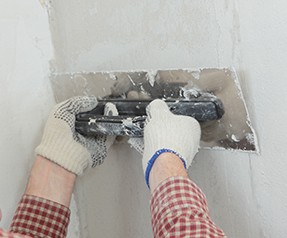
Skim plastering is the ultimate makeover for your walls – allowing you to wave goodbye to lumps and bumps and say hello to smooth, even surfaces, primed for decorating.

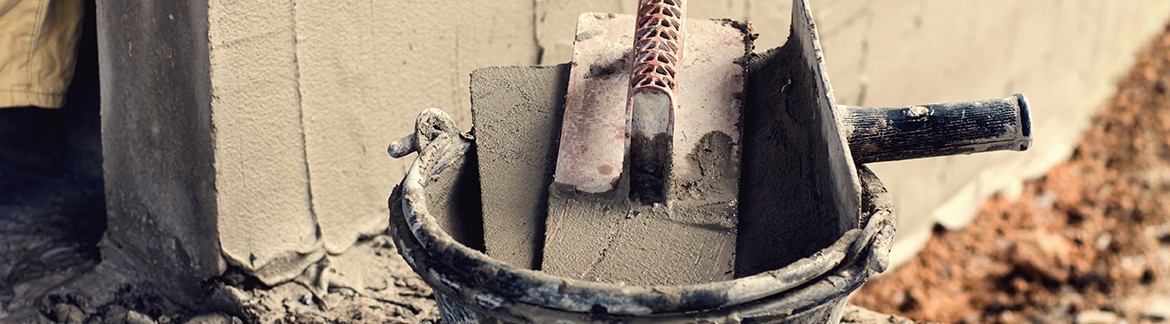
But don’t dive in just yet. Skimming your walls is a full-on job, and you’ll need to make sure you’re prepared with your equipment, and happy with what you’re doing before getting started.

Use our easy-to-follow, step-by-step guide to help take the stress out of skimming, so you can achieve dream walls that are smooth, even and crack-free.

1. Gather everything you need

Skimming is a time-sensitive task. Once you’re underway, you’ll need to work quickly to get the job done before things set. Here’s a list of all the equipment you’ll need to have handy:

 Plastic sheeting

 Hammer with nail pry tool

 Water-based primer

 Paint roller

 Ready-mix joint compound

 Quick-set joint compound (optional)

 Skimmer plate

 Large bucket

 Drill (if using quick-set)

 Mixing rod (if using quick-set)

 Trowel

 Taping knife

 Drywall knife (optional)

 Sandpaper

 Ladder (to reach high areas)

 Safety glasses

2. Prepare the room

Fixing up your walls will get dusty. Save your floors and furniture from dirt and splatter by removing anything you can from the space and covering anything you can’t with plastic sheeting.

Cover the floor with protective sheeting and remove cover plates from your light switches and plug sockets to keep them free from splatters.

It’s also a good idea to cover doorways to save plaster dust from escaping into other rooms.

3. Clean and prepare your walls

Before you start skimming, you’ll need to make sure your walls are clean from dust and that any cracks have been sealed. This will help you achieve a smooth finish with as few coats as possible.

Start by scraping off any loose plaster, then fill the cracks using the pre-mix joint compound and either your taping knife or a smaller drywall knife. Pull any nails from the surface and fill in those holes in the same way.

Once your walls are repaired, you can dust and clean them down to remove any grime that might affect your plaster sticking.

Make sure that all your walls are completely dry before moving onto the next step.

4. Prime your surfaces

Use a water-based primer to finish preparing your walls. With your roller, paint over every surface you are intending to plaster. The primer will help to seal any loose paper still on the walls and assist the adhesion of your joint compound.

Again, wait until your surfaces have dried before applying anything else to the walls.

5. Mix your plaster

If you’re using a quick-set joint compound you will need to mix it with water before use.

Mix your joint compound according to the instructions and remember to take note of the time limit printed on the packaging – this indicates how long you can use your mixed paste before it goes hard.

Mix the compound in your large bucket, using your drill with mixing attachment to make the process quicker (and easier on your arms).

The compound should form a mud-type consistency. Remember not to make too much compound at a time as the mixture won’t wet again once it has stiffened.

It can be useful at this point to pull in a helping hand, where available. While you set about plastering, your helper could start mixing your next batch of compound.

6. Apply the first coat

Now you’re ready to apply your first skim coat. Transfer your mixed compound to your skimmer plate – you want to be holding your skimmer plate in one hand and applying with the other.

Pile just a small amount of plaster onto your trowel, you can always add more later. Starting in one corner of the wall, drag your trowel vertically over the wall, applying a firm, even pressure.

Continue to apply out from the first spot you have covered so that each new scoop slightly overlaps the last. This will help make sure you don’t leave gaps and create an even finish.

Lay the plaster as quickly as you can and try not to worry about leaving trowel marks – you can smooth these over on the second coat.

7. Apply the finishing coats

Be prepared to apply at least two coats for a smooth finish.

You don’t need to wait for the first coat to dry before applying the second. As soon as you’ve finished covering a wall, go back to the beginning for your next coat, dragging your trowel.

This is where you can focus on smoothing over trowel marks, making for a completely even surface.

If you can still see obvious grooves and indents after the second coat dries, trowel on a third coat and drag it vertically, so each layer is at a right angle to the one before.

Try using a squeegee-like taping knife to taper the edges without leaving obvious trowel lines.

8. Sand away imperfections

Wait until your walls are completely dry before picking up your sandpaper, this will probably take 24 hours.

Once the surfaces are completely stiff, smooth away any rough edges, bumps or grooves using fine-grit sandpaper (180-220 grit).

If you have some higher areas, you can sand these using slightly coarser paper (100-120 grit), blending them into the lower areas for a completely flat surface.

9. Clean up

Once you’re done, you’ll want to give the room a proper clean-up to remove any excess plaster dust.

Reach the hoover right up in the corners and along the walls themselves. Leaving excess dust will make the surface less adhesive to wallpaper paste or paint, so be sure not to miss any.

And there you have it. Smooth and dust-free walls, ready to be decorated.

Top FAQs

'Plastering' is often used to describe both tasks. 'Skimming' or 'skim plastering' can be seen as one method used to plaster a wall.

The method of skimming entails plastering with a layer of thin coat and is usually applied to a wall with existing plaster, in order to smooth the surface area.

Other methods of plastering can be used to achieve rougher surfaces.

You will need to measure your walls to find out how much plaster you'll need.

For each wall, multiply the width by the height to determine the area in need of plastering. Then check the manufacturer’s instructions on the bag of your compound to find out the exact water to powder ratio that you'll need.

You should prepare to apply at least two coats, in order to achieve a smooth finish.

However, if you can still see obvious grooves and indents after the second coat dries, you can trowel on a third coat using the method mentioned in Step 7 of this guide.

Insuring your home

Now you've got your walls looking good, gain peace of mind by making sure your home is insured.

Insure your home with John Lewis Home Insurance by calling us on 0345 608 9001 or get a quote online.

John Lewis Finance, John Lewis Home Insurance and John Lewis & Partners are all trading names of John Lewis plc. Registered office: 171 Victoria Street, London SW1E 5NN. Registered in England and Wales (Registered Company Number 233462). John Lewis plc is an appointed representative of Munich Re Digital Partners Limited, a company authorised and regulated by the Financial Conduct Authority to carry on insurance distribution activities.

John Lewis Finance, John Lewis Insurance and John Lewis & Partners are all trading names of John Lewis plc. Registered office: 171 Victoria Street, London SW1E 5NN. Registered in England and Wales (Registered Company Number 233462). John Lewis plc is an appointed representative (Financial Conduct Authority no. 416011) of Covea Insurance plc which is authorised by the Prudential Regulation Authority and regulated by the Financial Conduct Authority and the Prudential Regulation Authority (registration no. 202277). John Lewis Specialist Home Insurance is underwritten by Covea Insurance plc. Registered Office: A&B Mills, Dean Clough, Halifax, HX3 5AX. Registered in England and Wales (registration no. 613259).

Copyright © John Lewis Partnership
Back to top